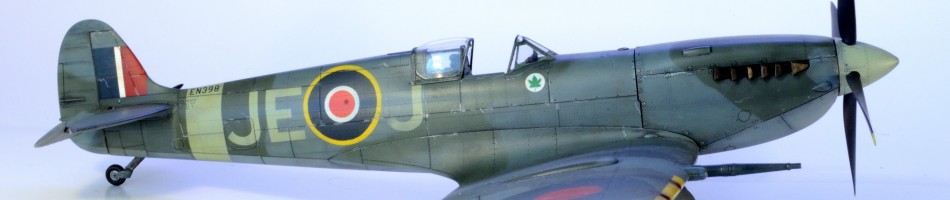
Wing and Main Assembly
With the fuselage closed up and seams addressed it’s time to move to the wing and main body assembly.
The wing assembly is pretty straightforward. Be sure to install the clear wing lights in each lower wing half. I painted the backs of these with silver paint instead of leaving them clear.

The detail inside the gear bays is pretty good on it’s own. I do question the decision to mold the entire thing in one piece. I feel that the better option would have been to supply the oil tanks as separate pieces, but painting them with a brush was not at all difficult. The ribbing detail provides a great opportunity to enhance the depth of the parts with a wash.
The engine nacelles are provided as two pieces that come together to be joined onto the wing assembly. These fit perfectly, just note that the line made where they join the wing parts do not fall on natural panel lines, so those will need to be dealt with.

One criticism I have of the kit is that the builder is only supplied with parts for depicting the engine cowl flaps in the closed position. Not a deal breaker really, but a lot of modelers like to display these open. The piece with the cowl serves as a mounting point for the engines. Modifying to open cowls would be a good bit of work; probably not worth the effort to most, but some options here from Revell would have been welcome.

With the wings assembled they were then attached to the fuselage. I must say this kit makes this task as simple as you could ask. The wings snugly snap into recesses molded into the fuselage. You could easily paint the wings separate from the fuselage before installing if you so wished.

Also at this time the tail assembly was finished off and installed. This is another completely painless assembly that snaps into place so well that glue isn’t necessary.

With the wings and tail complete all that was really left to do with main assembly was to address the clear parts.
First I dealt with the nose assembly. This part of the build comprises five clear parts. Clearly these pieces need to be strong, and we need to eliminate the join seams, so solvent was used to join these. However, first I needed to mask off and paint the inside. I knew I was going to end up using filler. Painting the interior color from the outside to show through is all fine and good until you start using a red filler on the seam, so these pieces were masked where appropriate from the inside and hit with the airbrush. Note that the supplied masking set does not include pieces for this, so if you choose to do so you will need to use some Tamiya like tape to cut your own pieces.
The forward nosepiece has been entirely assembled and painted, but I’ve only attached it to the airframe with white glue. This will allow me to pop it off post painting and place the machine guns. This makes masking much easier and I won’t risk breaking barrels.

The same approach was taken with the belly gun glazing. I masked it and attached with some white glue. It will be painted on the model and pulled off to allow gun placement at the end of the build.

Again, same with the ball turret; two halves masked and temporarily assembled with white glue.
Ball turret pic
The cockpit windscreen and the fuselage windows were permanently attached with Tamiya Extra Thin to ensure a solid join and were masked along with the other clear pieces.
Masks:
As this part of the build found me utilizing the supplied masking set I’d like to address it here. Clearly looking at the materials used and the instructions provided for them…

…one can conclude these were made and supplied by Eduard. If you’ve used enough Eduard mask sets you’ve probably run across some with pieces that are not correctly sized. I’m happy to say in this case every piece fit perfectly.
However, Eduard missed a bit because no pieces are supplied for the three nose lights. Fortunately, these are probably the easies to self-mask.

I would really just like to say kudos to Revell for providing this masking set. I’d love to see this as a standard feature on all of their kits.
Detail: 4/5
Exterior detail on the main body of the aircraft is overall good. Most of the panel lines are crisp, but there do appear to be some soft spots. These spots are particularly prevalent where the fuselage curves toward the tops approaching the join line. Detail is both raised and recessed, but the raised bits are limited. There are but a few spots of rivet detail.
I also knock off some for closed cowlings being the only option.
Engineering: 3.5/5
I take off a bit here for two reasons. First, I feel like the molded in oil tanks in the wheel wells adds a bit of work that could be saved were these pieces molded separately.
The biggest head scratcher here for me is why the decision was made to supply the nose assembly as entirely clear parts. Granted, the nose section ends up having 10 windows (4 on each side and one each on the top and bottom) and one clear nose section. I can see why the decision was made to cut the parts count down by giving two clear pieces housing 4 windows each. However, I would much prefer to work with traditional styrene and 10 inserts like the ones for the fuselage windows. Painting and assembling would be much easier without the added worry of dealing with clear plastic that is more brittle to work with.
In the end, I understand the decision making at Revell. The nose section as is makes general assembly a bit less painful for the casual or beginning builder.
Fit: 5/5
Nothing much to say here really; everything fits superbly. As mentioned, the wings snap into place. Once some solvent is run down the join lines they require no attention whatsoever. The other area that a builder may approach with apprehension, the tail, presents even less of a problem since it holds firmly sans glue. Though, I would add some just to be safe.
Clear pieces can sometimes be the killer for a kit when they don’t align like they are supposed to. The fact that I could mock assemble these with white glue for painting without having to worry about join clean up later is a testament to the quality of the kit.
With main assembly complete the build will be moving into the painting stage, so the nature of the WIP will change a bit. We will return to this format once it’s time to add all the final bits.

![]()
